

People Management
This help area provides important information on how to manage all Users of your Decise platform.

In this section learn how to:

Manage Users
Manage Participants
Decise Roles
Manage Users
Manage Participants
Decise Roles
Manage Users
The People module of Decise is where you can manage all types of Users you wish to invite to your Organization's Decise platform. Depending on what plan you have purchased, there are certain limits in terms of number of Users and Participants.
Invite a User
Sending a User Invitation
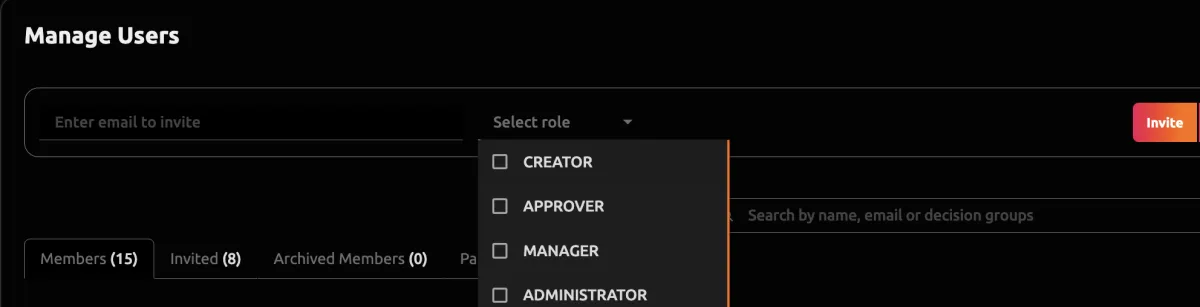
1. Go to the Settings>People section of the left navigation menu.
2, In the "Enter email to Invite" field, input the User’s valid email address.
3. Select the Decise Role from the dropdown list (you may select multiple roles if applicable).
4. Click Invite to send the invitation.
The User will now appear on the Invited tab until they accept the invitation.
Cancel a Pending Invitation
1. Go to the Settings>People section of the left navigation menu.
2. Go to the Invited section.
3. Select the User you want to cancel the invitation for.
4. Select the ellipsis and press Delete.

Add User to a Decision Group
After a new User accepts the invitation, they will be prompted to create a Password to login into your Organisation's Decise account. They will not be able to see any decisions until they are allocated to a Decision Group or assigned to a specific decision.
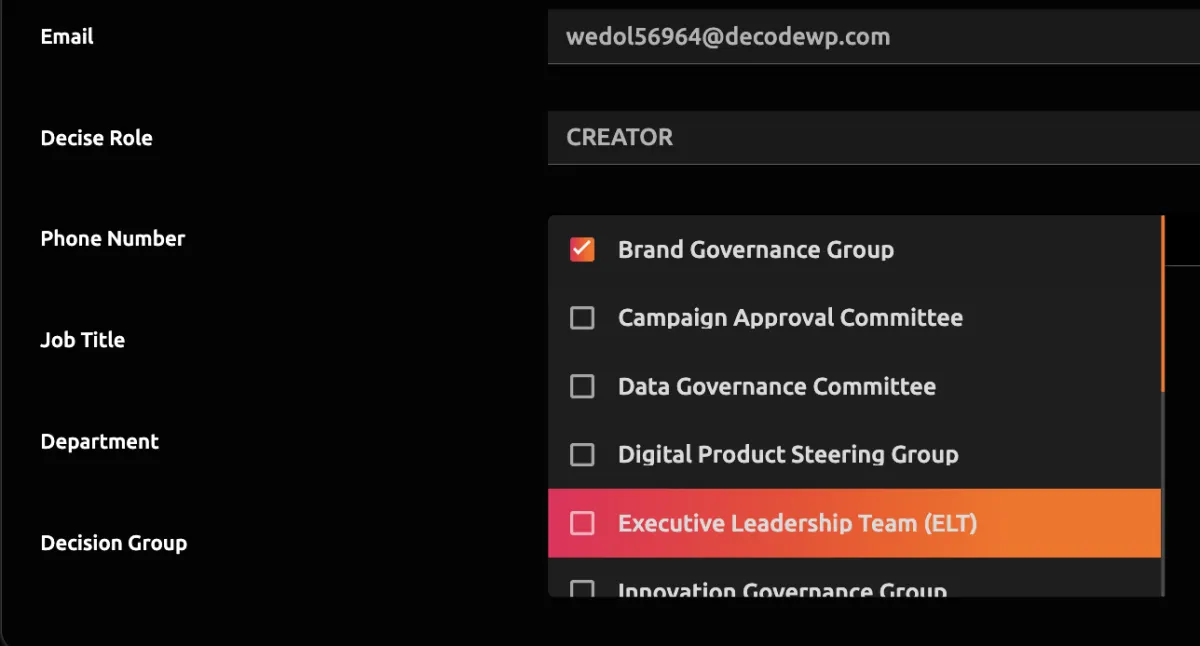
1. As an Administrator, you can edit the Decision Group of a User manually, one person at a time, by editing their profile in the Settings>People area.
2. Press the ellipsis menu next to the User and press Edit.
3. Select the Decision Groups to be allocated to this User.
Decision Groups must be added in the Organization area of Decise, before allocating them to Users.
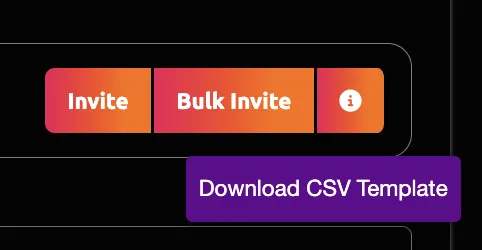
Bulk Invite Users
Bulk inviting users allows you to onboard multiple team members at once, saving time and ensuring they’re all set with the correct roles.
1. Go to Settings>People in the left navigation menu.
2. Press the information icon to download the CSV file template.
3. Add the details of the new Users in the spreadsheet, similar to the sample shown in the CSV file.
4. Remember to delete the sample User prior to uploading the file.
4. Save File.
5. Press Bulk Invite.
6. Select the saved File.
The new Users will now appear in the Invited tab until they accept the invitation.
Note, you can invite all User Roles via Bulk Invite except for Participants.

Delete a User
If a User is no longer with your Organisation or no longer needs access, you can choose to Delete them or Archive them. If there is a possibility that you will need to reinstate this User, it is better to archive them instead of deleting them. You won't be charged for these Users whilst they are archived, and they will not be able to use the system. However, the benefit is that they will not lose their historical data. Refer to Archive or Unarchive a User if you prefer to take this action instead.
To delete a User:
1. Go to Settings>People in the left navigation menu.
2. Go to the Members tab.
3. Locate the user in the list.
4. Click the three-dot ellipsis in the Action column.
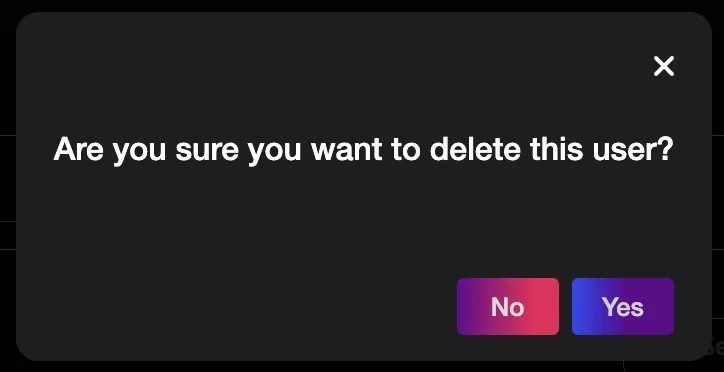
5. Select Delete to remove the User from the Decise platform.
A deleted User can be added back as a User in the future; however, they will be treated as a new User when they rejoin.
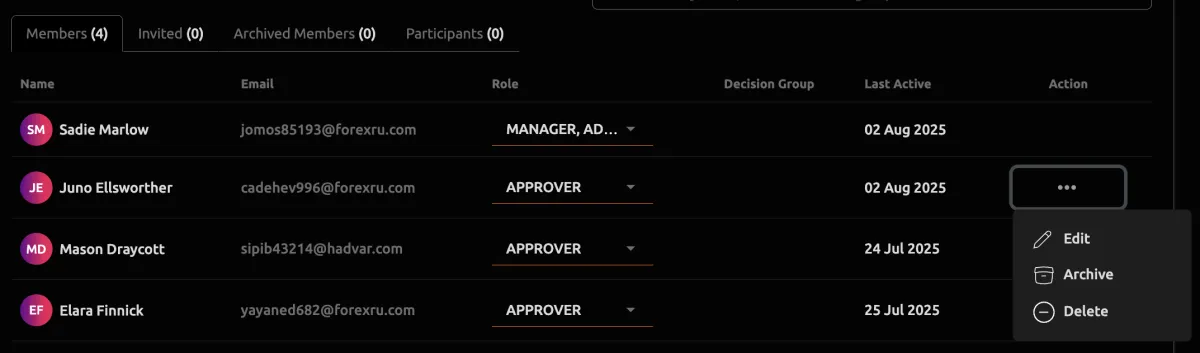
Edit User Profile
Editing user details and roles allows you to keep user profiles and permissions up-to-date.
To delete a User:
1. Go to Settings>People in the left navigation menu.
2. Go to the Members tab.
3. Locate the user in the list.
4. Click the three-dot ellipsis in the Action column.
5. Select Edit.
6. Update any field as required.
Archive a User
Archiving or unarchiving users allows you to manage active and inactive members in Decise.
Note you will not be charged for Archived Users.
To Archive a User
1. Go to Settings>People in the left navigation menu.
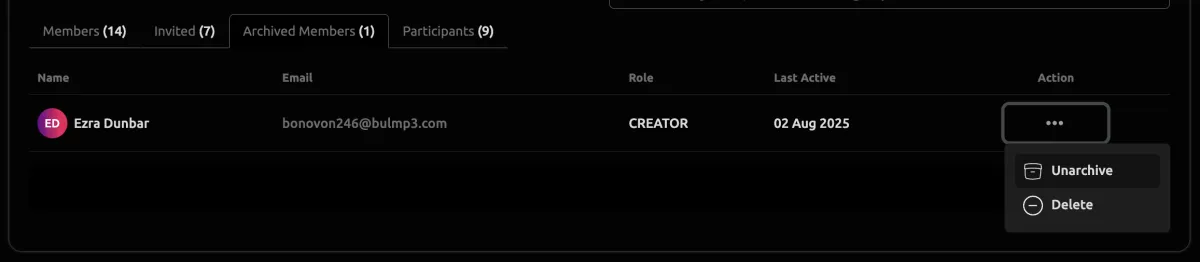
2. Locate the User in the Members or Participant tab.
3. Click the three-dot ellipsis in the Action column.
4. Select Archive to deactivate the user.
5. Confirm that you want to archive the user.
The archived User will appear in the Archived Members tab.
Unarchive a User
1. Go to Settings>People in the left navigation menu.
2. Go to the Archived Members tab.
3. Select the User you want to unarchive.
4. Click the three-dot ellipsis in the Action column.
5. Select Unarchive to reactivate the user.
You will be charged for this User should you unarchive them.

CONTACT US
[email protected]
0421 08 9979
501 Bourke St, Melbourne
VIC 3000, Australia
COMPANY
RESOURCES
Copyright © DECISE 2026 All Rights Reserved.